

Images
Images live in image frames. The frame sets where the image goes and how big it shows; the image inside can be moved, zoomed and turned without changing the frame.
Add an image
Section titled “Add an image”- Drop image files onto the page: each makes a new image frame where it lands. Dropped on an image frame, a file becomes that frame’s image. Several files dropped together are one step to undo.
- Draw an image frame with the Image frame tool (R), then double-click it, or press Enter, to choose a file.
- Choose an image in the Image menu of the frame’s Image section: one already in the template, or Upload image…
An image frame can also stay empty: it shows a crossed placeholder, and Checks warns about it, but the template can still be exported.
To let each document bring its own picture, choose an image field in the Image menu (Field: photo, for example) instead of an image.
The Image section
Section titled “The Image section”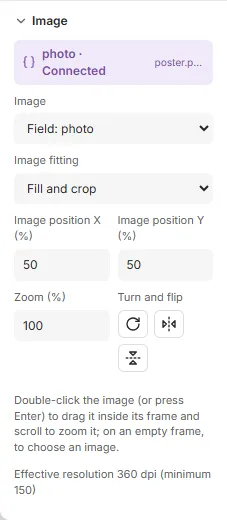
- Image: what the frame shows: No image, one of the template’s images, Upload image…, or an image field. Choosing another keeps the frame’s size, fit and position.
- Image fitting: Fill and crop fills the frame, cropping what doesn’t fit; Fit entire image shows all of it, with room left on two sides.
- Image position X (%) and Image position Y (%): which part of the image shows, from 0 (its left or top) to 100 (its right or bottom); 50 is the middle. With Fit entire image, where the image sits in the frame.
- Zoom (%): from 10 to 1000 %, around the frame’s centre.
- Turn and flip: Rotate image 90° clockwise, Flip image horizontally and Flip image vertically turn the image inside the frame. To turn the frame itself, see Frames.
The line below says the image’s effective resolution: its pixels per inch at the size it prints, against the template’s minimum (150 dpi unless the template sets another). An image below the minimum is warned about in Checks. In a pixel template, it says how many image pixels there are to each design pixel instead.
Crop and zoom on the canvas
Section titled “Crop and zoom on the canvas”Double-click an image frame, or select it and press Enter, to work on the image inside it:
- drag the image to move it within the frame; it stops where its edge meets the frame’s;
- turn the mouse wheel to zoom it around the pointer.
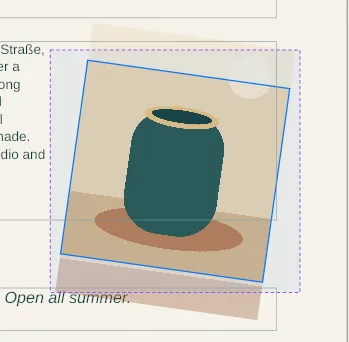
Press Esc, or click outside the frame, when you’re done.
Make text wrap around a frame
Section titled “Make text wrap around a frame”- Select the frame text should keep clear of, for example a photo.
- In its Layout section, tick Other text wraps around this, and set the Exclusion gap to keep the text that far away.
- Select the text frame that should wrap, and tick Wrap around exclusions in its Layout section.
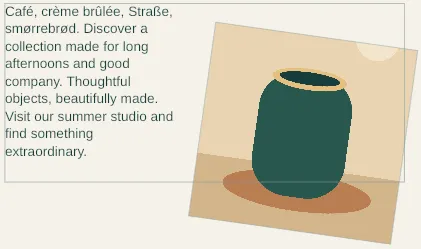
The text wraps around the frame’s shape, so it follows an ellipse or a custom shape too: see Shapes and soft masks. Wrapping doesn’t depend on which frame is on top.
Good to know
Section titled “Good to know”- Paprika takes PNG, JPEG, TIFF, PSD and SVG files. GIF, WebP, BMP, AVIF and HEIC files are converted to PNG as they come in; an animated GIF keeps its first frame.
- A CMYK TIFF or PSD stays CMYK, and prints as it is. A PSD’s spot colour channels are left out, and the editor says so. Lab, duotone and multichannel images are refused: save them as RGB or CMYK first.
- An image file can be up to 50 MB.
- SVG artwork is vector: it has no resolution limit. Paprika reads simple SVG only: a
viewBoxand filled paths, each a self-closing<path>with a six-digitfillcolour, up to 5 MB. Anything else (text, gradients, groups, other shapes) is refused, saying why: convert it to paths in your drawing app first. - A locked image frame isn’t filled by a drop: the file makes a new frame instead.
- For an image’s opacity and fades, see Fills and strokes and Shapes and soft masks.
Related
Section titled “Related”- Shapes and soft masks
- Frames
- Brand kits: your organisation’s shared images.